
- Calculators
- Software
- Electronics Assistant
- EPE Index
- Evil Genius - Resistor Attack
- Stopwatch with split / lap time functions and 1 millisecond resolution
Links to more software can be found here.
- Technical Data
- Pin-outs
Connectors
- 12N / 12S (Used on trailers, caravans etc.)
- Banana (Used on test leads etc.)
- BNC
- Car Cigarette Lighter Connectors
- Coax (TV / Radio aerial connector)
- D Type (Mutipole, commonly used on computers etc.)
- DC Power Connectors (Barrel type)
- DIN
- F (Satellite etc.)
- FCC68 Modular Connectors - Used on telephones and computers.
- IEC (Mains "Kettle Plug" type)
- Jack (All sizes)
- Mini DIN (PS/2, S-Video etc.)
- N
- Phono (Audio Connector)
- P552/1 (8 pin as used on disco lighting etc.)
- R.F. Connectors
- RJxx (RJ45 etc. - Used on computer networks and telephones)
- SCART (Audio Video connector)
- Socapex
- Speakon
- TNC
- USB (Coming soon)
- XLR
Components
- Beginners Guide
- Forum
- Links
Categories
- Books
- Educational & Hobby Sites
- Components, Kits & Test Equipment
- Design & Manufacturing
- Products & Other Equipment
- Lighting & Sound
- Magazines
- Projects
- Software
Want to suggest a link to add here, exchange links with us or get a banner for your website?Click here for details.
- FAQ
- Contact

Beginners Guide - Testing & Troubleshooting
Before you apply power, read the instructions carefully to check you haven't missed anything, and whether there are any specific instructions for switching on and testing. Check again that you have all polarity sensitive components the right way around, and that all components are in the correct places. Check off - board components are connected correctly. Check the underside of the board carefully for short circuits between tracks - a common reason for circuits failing to work.
When you are sure everything is correct, apply power and see if the circuit behaves as expected, again following the kit manufacturers instructions.
If it works, WELL DONE! You have your first working circuit - be proud of it! Skip the rest of this page and click the right arrow at the bottom, or here.
If it doesn't quite work as expected, or doesn't work at all, don't despair. The chances are the fault is quite simple. However, disconnect the power before reading on.
Check the basic's first - is the battery flat? Are you sure the 'On' switch really is on? (Don't laugh, it's easily done) If the project has other switches and controls check these are set correctly.
Next - check again all the components are in the correct place - refer to the diagram in the instructions. Look again at the underside of the board - are there any short circuits? These can be caused by almost invisible 'whiskers' of solder, so check for these with a magnifying glass in good light. Brushing the bottom of the board vigorously with a stiff brush can sometimes remove these.
Pull the components gently to see if they are all fixed into the board properly. Check the soldered joints - poor soldering is the most common cause of circuits failing to work. The joints should by shiny, and those on the circuit board should be volcano shaped with the component wire end sticking out of the top. If any look suspect then redo them. Remove the solder with a solder sucker or braid and try again.
Check for solder splashes shorting across adjacent tracks on the circuit board, especially where connections are very close such as on integrated circuits ('chips'). Solder splashes are most likely on stripboard. You can check for shorts using a multimeter set it to it's continuity range, or low resistance range. Be aware if you do this though, that there will be a resistance between some tracks due to the components. Any resistance below 1 ohm between tracks is likely to be a solder splash. Run the soldering iron between tracks on stripboard to remove any solder bridges.
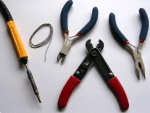
If the circuit still fails to work you will need to refer to the circuit diagram and take voltage readings from the circuit to find out what's wrong. You will need a multimeter to do this (see tools). Remember that if you find one fault such as a reversed component and correct it, it might have caused damage to other components.
If you cannot get the kit to work, check if the suppliers of the kit have a repair service. It's difficult to offer more advice than this here, as there are many possible causes of the circuit not working.
The next page cover's the question "OK, so I've done that, what now?"

