
- Calculators
- Software
- Electronics Assistant
- EPE Index
- Evil Genius - Resistor Attack
- Stopwatch with split / lap time functions and 1 millisecond resolution
Links to more software can be found here.
- Technical Data
- Pin-outs
Connectors
- 12N / 12S (Used on trailers, caravans etc.)
- Banana (Used on test leads etc.)
- BNC
- Car Cigarette Lighter Connectors
- Coax (TV / Radio aerial connector)
- D Type (Mutipole, commonly used on computers etc.)
- DC Power Connectors (Barrel type)
- DIN
- F (Satellite etc.)
- FCC68 Modular Connectors - Used on telephones and computers.
- IEC (Mains "Kettle Plug" type)
- Jack (All sizes)
- Mini DIN (PS/2, S-Video etc.)
- N
- Phono (Audio Connector)
- P552/1 (8 pin as used on disco lighting etc.)
- R.F. Connectors
- RJxx (RJ45 etc. - Used on computer networks and telephones)
- SCART (Audio Video connector)
- Socapex
- Speakon
- TNC
- USB (Coming soon)
- XLR
Components
- Beginners Guide
- Forum
- Links
Categories
- Books
- Educational & Hobby Sites
- Components, Kits & Test Equipment
- Design & Manufacturing
- Products & Other Equipment
- Lighting & Sound
- Magazines
- Projects
- Software
Want to suggest a link to add here, exchange links with us or get a banner for your website?Click here for details.
- FAQ
- Contact

Beginners Guide - Soldering
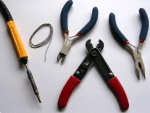
So, once you've got a kit and some tools, you're ready to start. When you're buying the kit, get a few spare resistors and some small offcuts of stripboard (also available from Maplin, the code for a small piece is JP46A). This will give you something to practice soldering with.
When you've got all these it's time to get some soldering practice. It might help to print this page to refer to while practising, or have a laptop or tablet to hand. Read the whole page through before starting.
How To Solder
Plug in the iron and wait about 5 minutes for it to heat up. Place it on something that won't burn, and make sure the 'bit' isn't touching anything, including the mains lead. Ideally use a stand.
Tin the bit - melt a small amount of solder onto the tip and wipe the hot iron on a wet sponge. If you don't have a stand (which includes a sponge) you will need a separate cellulose sponge, not a synthetic one that will melt and stick to the iron. Make sure the sponge is damp - using it dry will only mess up the sponge and won't clean the tip. This will put a layer of solder on the tip.
Bend the leads on the component with pliers to fit the board. Insert it into the board from the side without metal strips and bend the leads outwards on the other side to hold it in.
Place the tip of the iron on the lead where it comes through the board on the side with the metal strips. Make sure it touches the lead AND the board.
Wait a second or two for the board and the lead to heat up. Don't leave it too long, however, or you will damage the component. This is particularly important with semiconductors - transistors, diodes, I.C.'s etc.
Feed the solder into the joint until it forms a ring around the wire. It should stick properly to both the lead and the copper strip on the board. DO NOT carry the solder to joint on the tip of the iron, this almost invariably produces a bad joint.
Remove the iron and allow the joint to cool naturally. DO NOT cool it by blowing on it. The joint should look volcano shaped with the lead sticking out of the 'crater'! If it is not shiny, or has formed into a blob then you have made a 'dry' joint. If the joint is not complete re-apply the iron and add a bit more solder.
If you need to remove the solder, use a de-soldering tool or solder braid, or melt the solder and tap the edge of the board on the worktop to knock it off. Try again - practice makes perfect!
When the joint is OK, use side cutters to cut the component lead off flush with the top of the solder. Repeat the process for the other leg(s) of the component.
When you've finished soldering, clean the tip on the damp sponge and then re-tin it with fresh solder before you unplug the iron. This protects the tin plating on the tip and prevents it oxidising (thanks to Nick Prince from Weller UK for pointing this out). Remember to keep the bit away from anything that it could melt until it is completely cold.
Common Problems
Too much solder - joint will form into a blob, solder may bridge between strips on the board. Remove ALL the solder as described above and try again.
Too little solder - joint not complete, physically weak, possible not electrically sound either. Re-apply the iron and add a bit more solder.
Solder will not stick - component lead and / or board may be greasy or tarnished. Generally you should clean the lead and the board before soldering them. Ideally keep the board in an airtight container when not working on it to prevent oxidisation of the surface.
If you require more detail than is included in this article then take a look at the Basic Soldering Guide on the EPE magazine web site.
Don't rush to start building the project until you are sure you can produce good solder joints, as you will only spend more time later de-soldering bad joints, and may damage the components. When you're happy that your soldering is good, it's time to start construction.

